
| Details | |
|---|---|
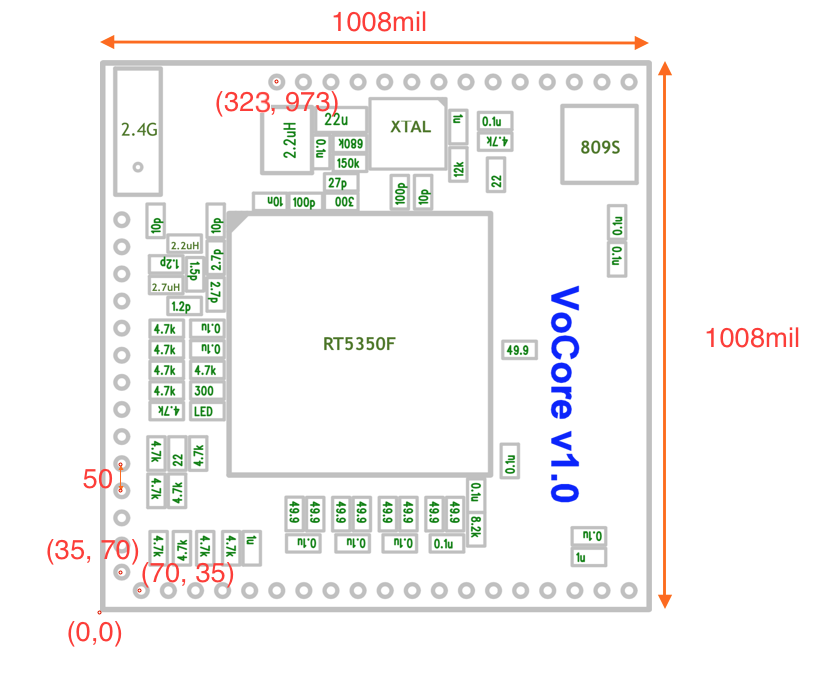
| SIZE | 25.6mm x 25.6mm x 3.0mm |
| CPU | RT5350, 360 MHz, MIPS 24K |
| MEMORY | 32MB, SDRAM |
| STORAGE | 16M NOR on board |
| WIRELESS | 802.11n, 1T1R, speed up to 75Mbps. |
| ANTENNA | one on board antenna. |
| ETHERNET | 5 ports, up to 100Mbps. |
| USB | Support USB 2.0, up to 480MHz. |
| GPIO | >=30 (pinmux) |
| UART | x2 (UART1 for debug console) |
| POWER SUPPLY | 3.6V ~ 6.0V |
| POWER CONSUMPTION | ~130mA~190mA, 5V input. |
Hardware: Download
uBoot: Download
Manual: Download
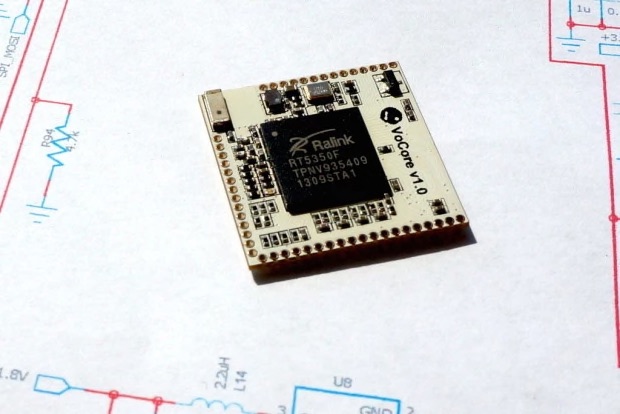
VoCore is the start of the project, it works stable on variours of productions over three years. It is not recommended for the new users, we have new version VoCore2 with video tutorials which is more friendly to new users.

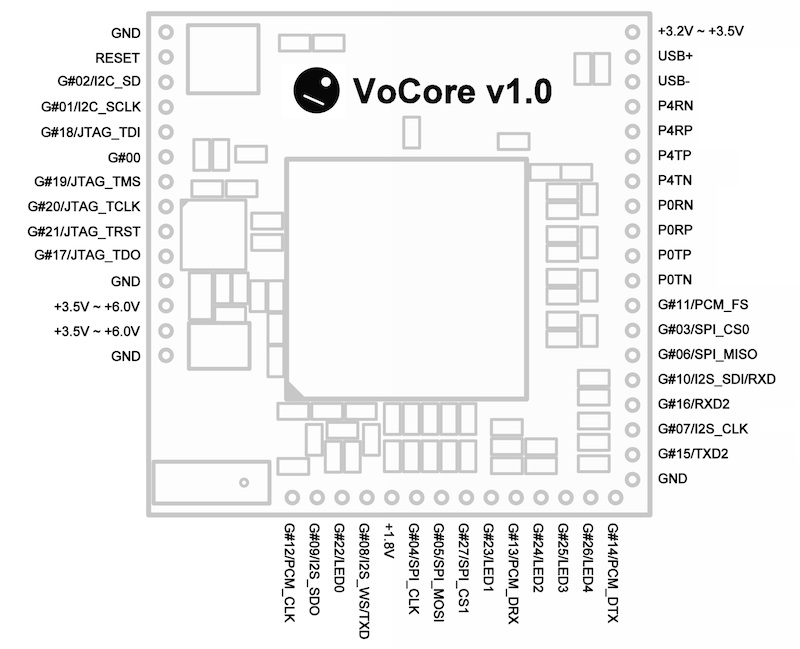
GND: connect to GND or battery negative pole.
RESET: VoCore reset, default pull to high.
G#02/I2C_SD: GPIO 02, or I2C SD.
G#01/I2C_CLK: GPIO 01, or I2C Clock.
G#18/JTAG_TDI: GPIO 18, or JTAG TDI.
G#00: GPIO 00.
G#19/JTAG_TMS: GPIO 19, or JTAG TMS.
G#20/JTAG_TCLK: GPIO 20, or JTAG Clock.
G#21/JTAG_TRST: GPIO 21, or JTAG Reset.
G#17/JTAG_TDO: GPIO 17, or JTAG TDO.
GND: same GND as first one.
+3.5V ~ +6.0V input: power supply, allow 3.5V ~ 6.0V input.
+3.5V ~ +6.0V input: power supply, allow 3.5V ~ 6.0V input.
GND: same GND as first one.
G#12/PCM_CLK: GPIO 12, or PCM clock.
G#09/I2S_SDO: GPIO 09, or I2S SDO.
G#22/LED0: GPIO 22, or ethernet LED controller 0.
G#08/I2S_WS/TXD: GPIO 08, or I2S WS, or UART full TXD.
+1.8V: 1.8V output, max current 300mA, ethernet power supply.
G#04/SPI_CLK: GPIO 04, or SPI clock.
G#05/SPI_MOSI: GPIO 05, or SPI master out/slave in.
G#27/SPI_CS1: GPIO 27, or SPI chip select 1.
G#23/LED1: GPIO 23, or ethernet LED controller 1.
G#13/PCM_DRX: GPIO 13, or PCM DRX.
G#24/LED2: GPIO 24, or ethernet LED controller 2.
G#25/LED3: GPIO 25, or ethernet LED controller 3.
G#26/LED4: GPIO 26, or ethernet LED controller 4.
G#14/PCM_TDX: GPIO 13, or PCM TDX.
+3.2V ~ +3.5V input/output: If you connect power to +3.5V ~ +6.0V, this port is able to output 3.3V, max 500mA; or use it as input, the voltage should between 3.2V to 3.5V.
USB+: USB Data +.
USB-: USB Data -.
P4RN: Ethernet port 4, R-.
P4RP: Ethernet port 4, R+.
P4TP: Ethernet port 4, T+.
P4TN: Ethernet port 4, T-.
P0RN: Ethernet port 0, R-.
P0RP: Ethernet port 0, R+.
P0TP: Ethernet port 0, T+.
P0TN: Ethernet port 0, T-.
G#11/PCM_FS: GPIO 11, or PCM FS.
G#03/SPI_CS0: GPIO 03, or SPI chip select 0.
G#06/SPI_MISO: GPIO 06, or SPI master in/slave out.
G#10/I2S_SDI/RXD: GPIO 10, or I2S SDI, or UART full RXD.
G#16/RXD2: GPIO 16, UART lite RXD2(default TTL console, 57600,8n1).
G#07/I2S_CLK: GPIO 07, I2S Clock.
G#15/TXD2: GPIO 15, UART lite TXD2(default TTL console, 57600,8n1).
GND: same GND as first one.


1. connect to 3.6V~6.0V and GND with a stable power source, such as USB charger.
note: Be careful, high voltage will damage your VoCore.
2. if everything works, after 30 seconds, you will find VoCore in your computer hotspot list.
3. connect to VoCore hotspot.
4.a using ssh or putty or similar tools login to VoCore(root/vocore).
4.b using USB2TTL, please check manual in Download section, UART=57600 8n1.
1. connect to your VoCore.
2. run command in console:
uci set wireless.sta.ssid=[AP SSID]
uci set wireless.sta.key=[AP PASSWORD]
uci set wireless.sta.network=wwan
uci set wireless.sta.disabled=0
uci commit
/etc/init.d/network restart
3. wait around 10 seconds, your VoCore is in AP+STA mode
note: you might need to setup network to enable dhcp(get ip from your hotspot).
uci delete network.wwan
uci set network.wwan=interface
uci set network.wwan.proto=dhcp
uci commit
note: you might need to setup firewall to enable access to internet through your hotspot.
uci del_list firewall.@zone[1].network=wwan
uci add_list firewall.@zone[1].network=wwan
uci set firewall.@zone[1].input=ACCEPT
uci set firewall.@zone[1].output=ACCEPT
uci set firewall.@zone[1].forward=ACCEPT
uci set firewall.@zone[1].masq=1
uci set firewall.@zone[1].mtu_fix=1
uci commit
1. Download and install VirtualBox(it supports Ubuntu/Windows/MacOS)
2. Download Ubuntu, install on your VirtualBox.
3. In virtualbox, we will need install some packages to compile openwrt:
sudo apt-get install gcc g++ binutils patch bzip2 flex bison make autoconf gettext texinfo unzip sharutils subversion libncurses5-dev ncurses-term zlib1g-dev
4. Download openwrt.
git clone -b chaos_calmer git://github.com/openwrt/openwrt.git
5. configure openwrt in menu, choose VoCore in menu.
make menuconfig
6. call "make", start the make process
note: video tutorial [youtube]
1. upload firmware through luci, please read manual in Download section.
2. upload firmware through console, connected to VoCore hotspot.
(1) copy from pc to VoCore[operate in PC]: scp [your firmware].bin root@192.168.61.1:/tmp/vocore.bin
here is two choices, 2.a will erase all data/config you write to VoCore, 2.b just upgrade the firmware but keep them.
(2.a) write to VoCore nor flash[operate in VoCore]: mtd -e firmware write /tmp/vocore.bin firmware
(2.b) system upgrade VoCore nor flash[operate in VoCore]: sysupgrade /tmp/vocore.bin firmware
(3) wait until mtd done, reboot your VoCore.
note: if you want set your VoCore back to first time boot up, call "firstboot" in console.
1. connect your VoCore to computer through TTL, please read manual for detail.
2. open tty tools(must have kermit protocol), such as kermit, ckermit.
3. power up your VoCore, once you find: "Press 'x' to active console", press 'x', into uboot console.
4. call 'loadb', then send the bin file through TTL by kermit.
note: kermit: after 'loadb', press Ctrl and '\' same time then press 'c', you will switch to kermit command console.
5. send upgrade firmware to VoCore, after that, back to VoCore uboot console.
note: kermit: call "send path/to/your/upgrade/file/on/pc.bin" to send firmware, around 10 minutes, once it finished, call 'c' back to console.
6. erase current firmware on VoCore.
note: kermit: call "erase linux", wait 15~20 seconds to finish.
7. copy firmware to flash.
note: kermit: call "cp.linux [hex size]", hex size is your firmware size in hex format, for example if its size is 3,145,732 bytes it should be 'cp.linux 300004'.
note: kermit: call 'cp.linux' might report error for wrong file size, please call "tftpboot" then Ctrl + C immediately, after that do "cp.linux [hex size]" again(tftpboot clear the wrong file size).
8. around 10~12 seconds, firmware uploaded, call "reset" to reboot your VoCore, your VoCore will work again.